|
Golden Lion Grrrages | 
|
|
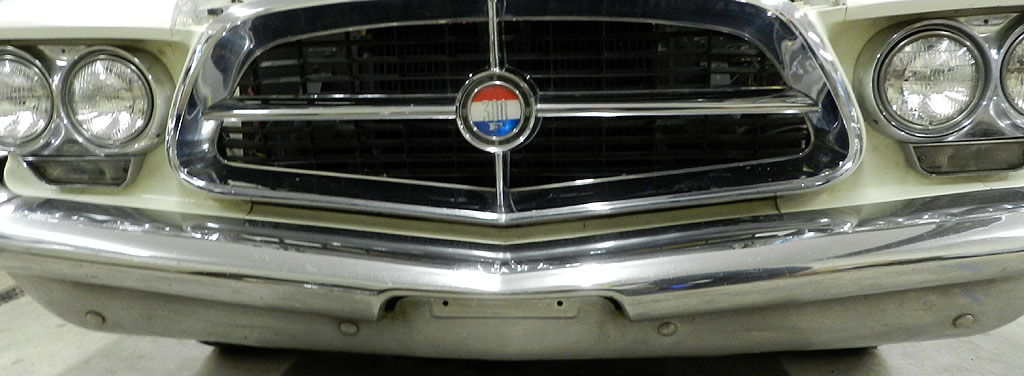
1960 Chrysler 300F
Page 2 |
Don bought the car December 20, 1975 with 56,375 miles. In 2024 the odometer is 62,573; 6,200 miles in 50 years. The last recoded use was in 1996. On the plus side, the car has been stored inside with little exposure to the sun for the last 50 years. As a result, things like the rear package tray, the window seals and the carpet are in remarkable condition. On the minus side, several of the brakes are frozen and other mechanical problems are expected from the lack of use.
March 2024: We opened the car to let it air out from years of being closed up. In the trunk there were a few indications of mice but we found all of the jack parts along with the original trunk cardboard and an original trunk carpet. The trunk floor is solid with no signs of rust. The trunk lip is rust free. This car is one of those without drain tubes.
The interior needs to breathe for a while but the carpet is original and in very good condition. The doors close with exceptionally good fit and with a solid thunk. The window seals fit very good. The rear seats are in good shape and still have their original Phillips screws in the lower retaining tabs. They were removed for thorough cleaning. Old mouse nests were found in the upper seat backs. I am reading up on various treatments for odors.
Front seats show normal wear. The engine turns over by hand and there is fluid in the radiator. The gas tank does not smell and there is no sound when sloshed so I think it is empty but I expect the tank won't be good. The driver side front power window front is only one not working. The power seat works great. We have all lights except the license plate. Brake lights are unknown since the master is shot. There is no instrument panel lights and no horn. I see paint repair rear quarters below the side spear trim line. Above that trim, the paint is original and surprisingly good. There are air-craft type seat belts for the fronts and the windshield is correct. There is the optional and 7 button radio with rear speaker. The battery tray has the little wire hook for the vacuum tank hose and the passenger fender still has the original heater hose support hook. The ignition key works both door locks and neither the keys or the locks show significant wear.
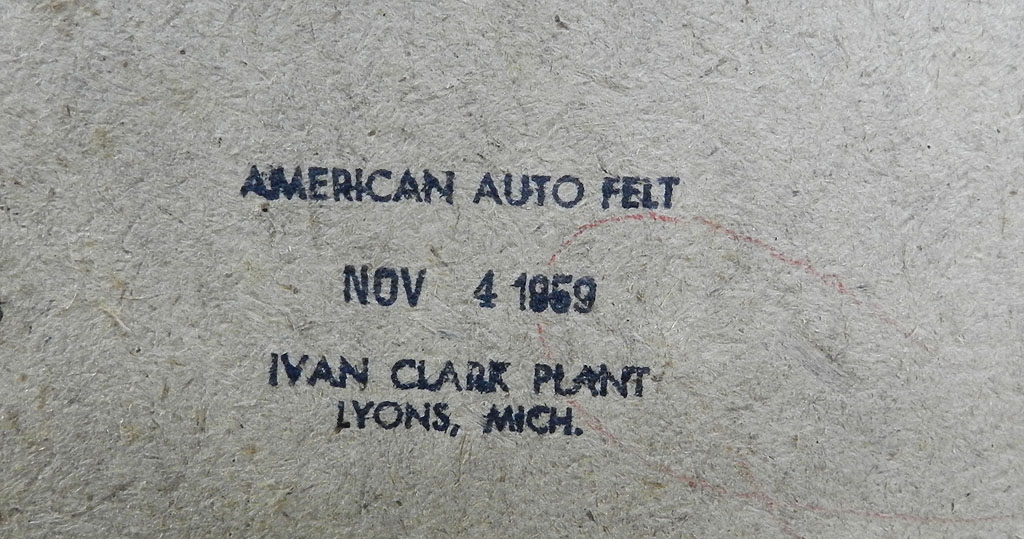
I removed driver side rear interior panel. The sill plate had to come off first and it has no corrosion. It is in exceptional shape for an original. The rocker is rust free. The rear interior panel came off easily and showed no water damage; it is straight and solid with a date code on the back side of Nov 4, 1959, American Auto Felt, Ivan Clark Plant, Lyons, MI. The original vapor barrier was there and no mouse debris. I lubricated the window tracks and gears. The alignment of the window glass is perfect. With new lubricant, the window raises quickly and seals very well. The arm rest and panel were treated with Lexol cleaner and Lexol conditioner and reassembled. The mounting pins and screws lined up perfect.
I went to passenger side to do the same thing. I could tell someone has been in here before; two of the exterior screws are wrong but I found correct ones to use on reassembly. After lube, the passenger rear window works good although not as good as driver. The interior panel has same Nov 4 markings. There were no signs of mice and the areas inside the quarters are clean and rust free. The rear arm rests had mold on them which cleaned off with cleaner wax and now look very nice. The package tray is near perfect.
The rear console center arm rest cover is tight. This car has the early style button guide fastener. I removed cigar lighter from front console because it was dimpling the hopper cover like they all do.
The rear brakes are frozen and I decided to work on driver side rear brake which gave me my first look under the car. It has original rear springs. Except for the gas tank, everything looks very good. The rear quarters still have the assembly tabs. To the brakes, one adjuster moved easily but the front one is stuck and has the hex rounded off. A spare brake adjuster plate may be required in the future. I hooked up the 5 leg puller and was able to remove the drum even though shoes were out. The wheel cylinder is frozen. The brake hub has rust which should clean off. I removed the brake shoes and installed the brake hub and wheel. I will work on the passenger side rear brake next week.
Time to work on the passenger side rear brake. One brake shoe adjuster moved but the other would not. I applied the hub puller and was able to wrestle off the drum. Just as the driver side, the wheel cylinder was rusted solid and the shoes rusted to the brake drum. I removed the shoes and installed the hub and wheel but still the car will not roll. I found the passenger front wheel would not turn even after backing off both adjusters. The hub would not release from the stuck shoes. We put a scrap steel wheel on and beat it from the back side with a sledge. That worked. Removed shoes, same story, reassembled. The driver side front was stuck as well. Shoes removed and now the car rolls easily. Later I realized I could have used the rear hub puller on the front hubs -- it will fit fine. I washed rear seats upper and lower with Lexol cleaner and conditioner. Except for the tops which show sun burn, they look good. I removed the steering wheel horn ring and center hub, washed, polished and waxed. The steering wheel is near perfect and cleaned up with a damp cloth. I removed the driver side front door panel to access the power window motor. The door panel date is Jan 15, 1960 and is in good shape. The driver side pull handles, the window channels and slides were lubricated. The window motor and transmission were removed. The motor looks good. When tested with jump battery, it and will move in both directions although slowly. With the motor out, I raised and lowered window vigorously to work in lube. It moves very well now. We have a video here of the work to date.
The rebuilt driver power window motor was installed, tested, and the window works great. I had two new power window wire rubber tubes in stock so installed. The driver side is much easier to install on a letter car with the master switch in the console -- fewer wires to run through the tube. You can get new wire tubes from Quirey, part number 79B. Checked out the no-blow horn situation. The horn relay looks good, checks for power were good, the ground was freshened and now the horn works. I have no map light when the doors open. The 1004 lamp was broken, replaced and solved. The dome lights on this era car work only from the switch on the Astradome chin. Teasing the switch back and forth several times made both dome lights work. Removed the console ashtray and found they had broken off the top off and that is why it fell in the console. Although you can reattach the top with JB Weld, I had a spare in stores and did the swap.
I decided to remove headlight switch and work on dash light problem. I don't remember access to the switch being this difficult. The shaft release button is on the far side of the switch body in 1960 and 61, placed in between wire connections. I could not get to it. I decided to unscrew the switch bezel to gave me more access but still no luck. Thought I had the release button and was pulling on headlight shaft when the knob came off. I had never saw that before. But I was now able to remove the headlight body with shaft still in it. Now that I could easily get to the release, the shaft remained stuck. Even so, I was able to test the switch with jumpers. From the battery post to the orange, the oscillator wemt on and we have the electrolum speedometer, 12 volt push button lights but no heater lamp. This test tells me the headlight switch needs to be replaced.
I had a NOS headlight switch is stores. Studied the wiring (easy), installed wires on new switch, tested before install, all OK. Working the switch back into position in the dash was a little wrestle. Got smart and installed retaining bezel on thin long blade Philips screwdriver, poked through dash hole for switch, was able to mate the new switch to the screwdriver blade and then to catch bezel. Pretty quick and easy. Tested new switch in dash, all works fine. I have a nice full control range on brightness of electrolum and heater-trans lamps plus the ignition key lamp and the tach lights.
Let's replace the heater control switch. I had a rebuilt switch by J Grady ready to go. On removal I noticed the exterior bezel has gouge and need to get better one. Noticed heater lamp is not shielded in a tube, lamp base is Philips screw not machine screw, and vacuum tubes not retained with clip -- these may be early production things. Replaced lamp 1816, washed polished and waxed heater buttons. There was no need to repaint faces. I found a nice heater bezel to replace the gouged one. Installed new pieces and checked heater controls and fan speeds. All checked fine. All buttons work super smooth.
Moved on to check of license plate lamp not working. Turned out it was no ground of housing through mounting screws. Cleaned screws, all set.
To Page 3 | ||||||||||||||||||||||||||||||||||||